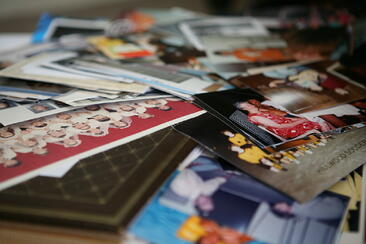
 The other evening I went over to my neighbor’s house and noticed that her dining room table was covered in photos.
I asked her what she was doing. She told me that when her mother passed away her siblings nominated her to take care of the family photos. She said she was trying to sort everything out, make copies and then give to her siblings.
Approximately three months later I asked my neighbor how her project was going. She replied, “Everything is back in boxes and in the basement; it was too exhausting and I hated always seeing the mess on my table.”
5 Photo Organizing Tips
Have you ever felt like this? I had offered to help my neighbor but she said she wanted to tackle the project herself.
Here are the five tips I shared with her:
1. Create four sorting categories.
-
Discard: Place all blurry, back of the heads, cut off heads, and overall poor quality photos in this category. You do not need to throw these photos away, just label them accordingly so that you know they are not quality photos. When you are ready, discard them or give to your siblings (at least they are out of your house).
-
Restore: Place all the photos that need restoration in this box. Restoration is a separate process that can be managed at a later date.
-
Unknown: Place all the photos of people you do not recognize in this box. Your siblings can look through this box at a later date and identify anyone they recognize. Keep this as a project for the future.
-
Known: Photos you recognize or are labeled.

2. Loosely organize the "known" photos by decade.
Use index cards taped to boxes labeled with 1920, 1930 etc., and sort photos accordingly.
3. Turn on some favorite music or play a CD.
Take 10-15 minute breaks every hour and start again. Limit your working time to a couple hours per day otherwise you will start to feel overwhelmed.
4. Outsource to a photo scanning service.
You can take your photo prints, slides and film and convert photos to digital format for future preservation and easy sharing. Be sure to do your own research but here are a couple suggestions:
-
Seek out a local personal photo organizer
-
Seek out a reputable local or online photo scanning service
-
If you purchased a scanner and don't want to scan the photos yourself, seek out a tech-savvy teen in your neighborhood and pay them per photo to scan the collection.
5. Back-up the photos.
Once the photos are digitized, send copies of the DVDs or flashdrives to your siblings and let them address more detailed sorting if they desire. In addition, make sure a copy of the photos are saved via a reliable cloud service and backed up on a second hard drive.
Preserve Your Valuable Memories
All photos include valuable memories and special stories that need to be told and shared. However, your initial goal is to get your siblings copies and to clear off your dining room table. So what can you do with all the printed photos?
Store your favorites in photo safe boxes - they will be fun to actually pass around and share at family gatherings.
How are my neighbor’s photos? Still in the basement...she just called me though, and I am starting to work with her on Monday!

Rita Norton is a certified photo organizer located in Portland, Oregon. She has been helping her clients celebrate their photos for 15 years. Visit her website Photovation and join her mailing list to receive free photo organizing tips. She also offers forms to help her clients organize their photos. Check out Photovation on Facebook.


