
Trick-or-Treat! Happy Halloween!
If you’re too old to go trick or treating but want to have some Halloween fun, try creating some of these DIY Halloween photo projects. With some creepy creativity and minimal supplies, you can make these spook-tacular photo displays!
#1: Trick or Treat Photo Hanger
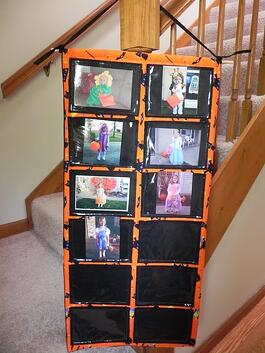
If you’ve got shoeboxes of photos showing off your munchkin or friends’ and family’s Halloween regalia, it’s time to convert those photos to digital, print, and create. You just need a couple pieces of fabric, a skinny dowel rod, and some square cut pieces of vinyl that when put together, create a hanger with “pockets” to slide photos into. The ideal photo size for this are 5x7’s, likely the size (or close to it) of old pictures you have tucked away. If you’ve already taken the step of converting photos to digital, edit as you wish and print as 5x7’s. If you haven’t, find old Halloween pictures and convert photos to digital. You want crisp, sharp images showing off the vivid colors and creative costumes, and converting photos to digital will allow for editing to achieve that.
See this project on Pinterest here.
#2: Halloween Photo Tree
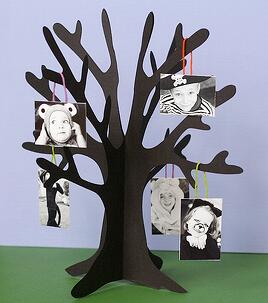
This can be as large or small as you wish. Once you’ve converted photos to digital, print in whatever relativesize needed. Get some some acrylic paints, cotton fabric, muslin, Spanish moss, wire, and an unfinished wood Halloween tree or unfinished wooden tree cut out , available at almost any arts and crafts store. Essentially you’re creating “photo ornaments” to hang on the tree after you’ve spruced the tree up with some spooky paint, perhaps painting faces, bats, skeletons, or whatever you wish. Frame the photos with fabric or another material, glue wire to the photo backs, and hang on the branches. If you really want to run with this idea, you can even make a little haunted forest!
See this project on Pinterest here.
#3: Halloween Photo Garland
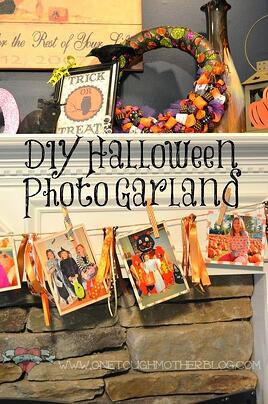
This project is simple and quick – requiring wooden clothespins, Halloween or autumn inspired ribbons, twine, and glue. Cut different ribbon pieces to fit the flat sides of clothespins, glue them on, and tie pieces of ribbon to the twine. Print photos to the desired size (4x6’s work best for this), pin them onto the twine with the clothespins, and you’re ready to deck the walls Halloween style!
See this project on Pinterest here.
#4: Halloween Photo Collage Wall
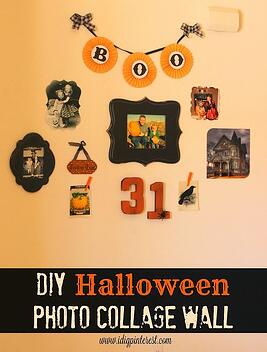
This is project definitely demonstrates the power of converting photos to digital, as you’ll want to print chosen photos of varying sizes for it. This project can really be fun as you and your family can go on a “scavenger hunt” to find what you want to hang in the collage with the photos. Gather materials like ribbon, creepy pictures of things like haunted houses that you find online and print or pull from magazines or books, felt fabric or materials to create frames with, craft paper…the options are endless! Wooden cut outs of letters to spell words or the numbers “31,” or cutouts of bats, birds, or pumpkins are great too. Hang together with favorite Halloween photos in whatever collage style you’d like!
See this project on Pinterest here.
#5: Paranormal Portraits

Another great project that will show you the fun you can have after you convert photos to digital! For this, choose any photo you like -- not necessarily past Halloween pictures -- but portrait style photos work best. Play around with the pictures in photo editing software, putting them through black and white, sepia toned, or fading and shadowing filters to give them creepy effects. Once frightening enough, print them, and give them an aged texture by sponging black craft paint with water onto them. Once dry, cut card stock the same size as the photos, glue to the backs, and cut out the eyes of the photo’s subject with an X-Acto knife. Cut through the card stock on the back as well, creating holes about ¼ inch in diameter. Put the photos in frames, insert red mini-LED lights through the eyeholes, plug in, and turn on for eyes that will burn right through you!
See this project on Pinterest here.
Have left-over prints after your Halloween DIY projects?
Ensure lasting memories by digitizing your prints!

Photo credit: interactive360.wordpress.com